Published: July 7th, 2018 Last Modified: October 16th, 2018
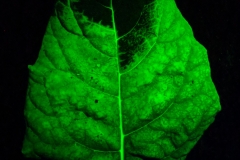
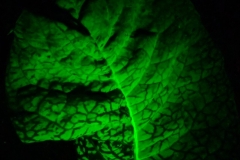
Ever since my original post regarding making a DIY bandpass filter, I’ve been pretty obsessed with macro-view imaging of fluorescent proteins (FPs) in plants. The quality of pictures have come a long way, take a look, it’s a leaf infected with a potyvirus that carries eGFP within its genome:

Now, maybe it’s just me, but that looks beautiful. How did I get here? Unfortunately I had to give up on using stage film, it’s cheap, you can use funny filters named “Pale Bastard Amber”, but when you’re looking at fluorescent proteins on this macro scale they don’t cut it. For a bit more money, you can get publication quality pictures with a few filters, some 3D printed parts and a cellphone camera. Let’s get into the nitty gritty logistics when it comes to looking at FPs in plants.
What makes imaging of plant leaves challenging? Most of it arises from the fact that plants contain all sorts of pigments, which are neat, but fluoresce when you excite them with specific wavelength of light. Chlorophyll A and B are the most common plant pigments, here’s what their absorption and emission spectra look like (Picture source):

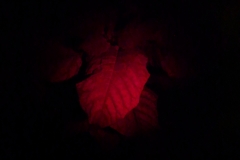
So, shining a light anywhere from the UV-C to 500 nm will cause the plant the emit a LOT of red light. Remember what happened when I shone a 450 nm LED at my plants?
Even with the lights in the room off, the red overpowers any fluorescence you’d be looking for.
The initial experiments with the stage films were fun, however their issue is that they are very inefficient when it comes to blocking out unwanted light. Let’s take a look at the #12 Straw filter we used last time for eGFP viewing (source):
#12 Straw is actually one of Rosco’s best filters, but is it effective in acting as an emission filter for a 450 nm LED?
You can see that although the main wavelength emitted by the LED is 450 nm, it tails off in either direction. The #74 Night blue as the emission filter isn’t particularly effective at cleaning up the LED light. The straw filter as the emission filter is effective up to about 470 nm, but starts transmitting the light of those tails. While the relative amount of light at those tails is small, it easily swamps out most fluorescent proteins. That’s why we needed four layers of the straw filter to see anything useful. Four layers, each one only transmitting 80% of the light going through it, robs you of available fluorescence going into your camera.
So, we need better filters. If you have the money, new filters are nice, but they usually run 200-400$ a piece from Omega etc. Where can we get some high quality filters without having to run a bake sale? eBay!!! Luckily, I found a good seller (bjomejag) of overstock/overproduction runs of professional grade filters. The size that are easy to work with are the ~25 mm diameter filters, and they can either come as finished filters in aluminum rings or unfinished as raw glass. You can pay anywhere from 20-60$ for most of the filters you will need to view FPs in plant/animal tissues. Here’s my ever growing collection:

Most of these are bandpass filters, with a few short pass filters here and there. Here’s what Omega Optic’s glossary defines them as:
“SP: Shortpass filters transmit wavelengths shorter than the cut-off and reflect a range of wavelengths longer the cut-off.
Bandpass filter: Transmits a band of color, the center of which is the center wavelength (CWL). The width of the band is indicated by the full width at half maximum transmission (FWHM), also known as the half band width (HBW). It attenuates the light of wavelengths both longer and shorter than the passband.
Bandwidth (HBW, FWHM): Width of the passband: specifically, the difference between the two wavelengths at which the transmittance is half the peak value.”
For our purposes this is the jargon we need to understand. Onto actually building the eGFP viewer.
First, I upgraded the light source. While the 450 nm LED does excite eGFP, however eGFP’s maximum excitation is closer to 490 nm. We can edge a little bit closer to this with the Cree 470 nm blue LED, for smaller leaves get the single chip LED, for bigger leaves get the 3 chip LED. I went with the 3 chip version driven by a 12V 700ma power supply. Now, how are we going to clean up this light, considering we are also edging closer to the emission wavelength? The filter that I used specifically are these 490 NM short pass filters, initially produced for curing resins:
Link to buy your own! (Link will be updated when they sell out)
What kind of transmission profile does it have?

That’ll do nicely, basically 0% transmission past 490 nm, so the LED light won’t swamp out any fluorescence we get. One caveat here, some of the filters sold are unfinished, that is they are not fit inside a nice protective aluminum ring. This filter is made by sputtering and layering glass, so if you’re not careful you can separate those layers…how do I know? Optics aficionados may want to look away.


Yeah…whoops! Surprisingly the filters still work, but man do they look ugly. Just be careful pressing unfinished filters into housings. I’ve since started to 3D print my own protective rings for unfinished filters:

So, we have the excitation filter sorted, how do we mount it?
In this final-ish setup I have a 3-up 470 nm blue LED mounted in LEDsupply’s 15W housing to keep it from getting too hot. The LED is fixed to the aluminum inside with some nice 3M thermal tape. The fixture holding the filter over the LED is printed in Biofila POWR filament, kind of hard to find but its easy to print with and is resistant to the heat the LED puts off. Any heat resistant filament will work here.
That’s the light source taken care of, how do we view the fluorescence coming off the plants? First, we need an emission bandpass filter that will filter out the light used to excite the FP’s (with 470 nm LED, tails off into the emission wavelength) AND the 600-700nm red auto-fluorescence of chlorophyll, while letting through the peak emission of eGFP at 510 nm.
Here’s the filters you can use:

Update: 515/30 does not work as well with the 470 nm LED, too much cyan leaking through, stick to 450 nm with this filter.

My old 525/30 filter, works a treat with 470 nm LED
For eGFP the following filters will work, 510/20 nm (transmission profile above), 515/30 nm filter and 525/30 filter. Basically, the first number is the wavelength the bandpass is centered around, and the second number is the bandwidth, how much light on either side of that peak wavelength is transmitted through the filter. As long as it blocks out light below 500 nm and above say 550, you’re set.
510/20 emission filter, would work best with 450 nm LED
530/30 filter, close to my 525/30, ideal for 470 nm LEDs.
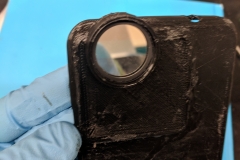
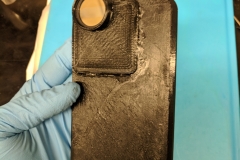
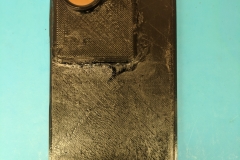
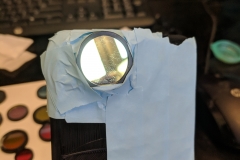
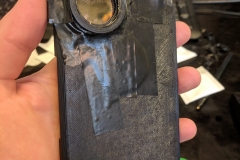
Now, how do I mount this to my cellphone? Here’s the evolution of the filter holder design for my cellphone, it started off with taping the filter to a 3D printed cellphone case, now the case and filter holder are printed in two parts out of rubbery TPU and solvent welded together. Still not the prettiest thing, but serviceable.
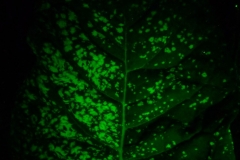
Here’s more proof that the setup works well.
There you have it, a high quality method of viewing eGFP. How much did it cost me?
- Two filters w/ shipping – 80$
- 3 up LED – 23$
- Optics for LED – 2$
- Power supply – 8$
- 15W Housing – $40
- Wiring, connectors, misc – 15$
- Heat resistant filament – 40$
So, maybe 200$ +/- 30$ depending on what you have lying around. Its 3-10 times more expensive than a few rolls of stage filters, but the jump in picture quality is worth every penny, definitely publication quality.
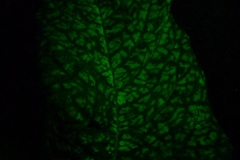
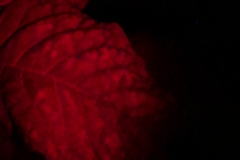
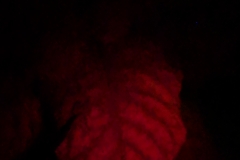
Now, I haven’t stopped there, at the moment I’m working on a mTag-BFP2, cerulean3, LSS-mOrange and E2-Crimson clone of my virus, so visualizing these clones will follow the same design. I actually did make up a similar viewing apparatus for mCherry, however since the emission of that protein overlaps with the red emitted by chlorophyll, it wasn’t really a good choice, take a look.
So, generally speaking, if you’re going to do whole leaf FP imaging in plants, stay away from the red portion of the spectrum, the contrast is pretty bad. We will see if E2-crimson is any better, but it won’t be as nice as eGFP. I’m planning on doing co-infection experiments, so I’m holding out most hope for BFP2/eGFP. Will update as pictures become available.


Hi Alex,
Very nice discription of filters and setup for visualizing eGFP. I routinely use eGFP for tracking protein sub-cellular localization in transgenic algae. It’s nice to have a setup where instead of checking lines through a microscope if they can be visualized on a patched plate directly via a camera. I started working on FluoPi: https://journals.plos.org/plosone/article?id=10.1371/journal.pone.0187163
But I made a mistake that the Blue LED that I used has a spread of 450-465nm. Luckily I have a few Kodak glass filters from long time back. I hope this setup works well for me.
Really like your channel.
Best,
Yogesh